Getting started
This page will run through the installation on new machines.
Disclaimer
The following is mostly written to address a new Mac running on MacOS Ventura. The process applies to Intel or Apple Silicon-based Macs. Similar steps will apply to a PC or Linux machine and we will add those Windows-based deviations accordingly.
Requirements
In order to run Strata (but more specifically the Stratasphere), we will need a few tools from the get-go. You can argue a series of these being optional, but are strongly recommended to make the process easier.
Tools/Applications/Languages
A terminal application -Such as Terminal, Warp or iTerm
1Password
PHPStorm or VSCode (any IDE really)
Homebrew
Node with NPM
PHP
Composer
Laravel
Valet
MySQL
Redis
Envault
We store .env configurations and updates within envault
Installation
Terminal
You can use the standard Terminal application but your life and overall happiness may improve with a good terminal app such as iTerm or our personal favorite: Warp.
1Password
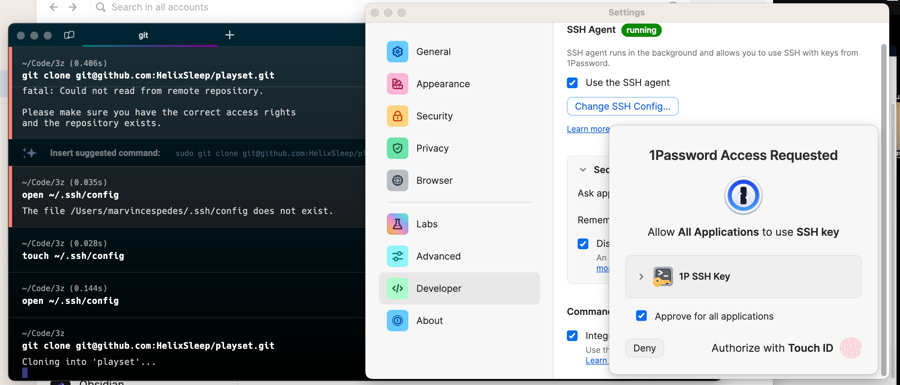
1Password is the application we use to manage all our passwords. 1Password will not only store any and all passwords you need to create or maintain but is also a great tool to save your specific .env files as those will never be merged into GitHub.
You can also use 1Password to manage your SSH public keys. Doing so will ensure that you can still access Github and other tools regardless of the machine you are working from.
Homebrew
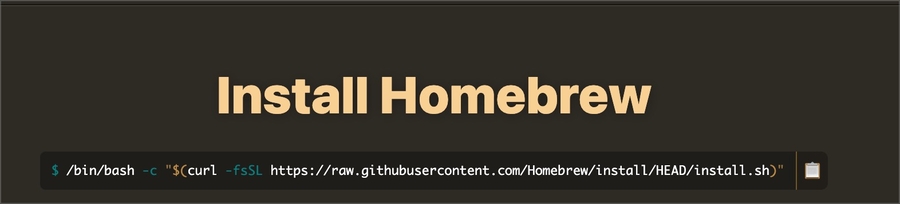
In order to install PHP and a number of tools, we will be using Homebrew.
The first step is to get our environment in order. We will begin by First step is to clone down the repo to your local machine. You may need to agree to the xcode license before continuing installation.
Verify the install with brew -v
Node and NPM
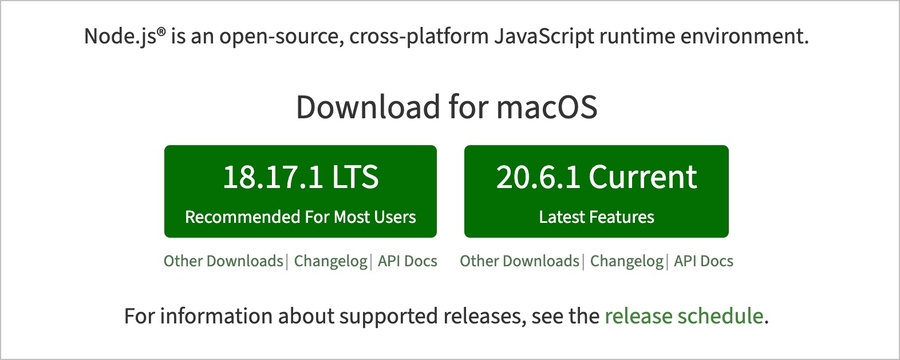
Next we will install the latest stable version of Node. This will manage any Javascript packages and bundling we use in our project.
Verify the install with node -v and npm -v
PHP
Using Homebrew install the latest version of PHP. Once we install Valet, we will use it to download the 8.1 version of PHP as Valet is better equipped to switch between PHP versions.
Verify the install with php -version
Composer

Verify the install with composer -V
Laravel
Stratasphere is a Laravel application. There is no need to create a new Laravel project. Cloning Playset from our repo should be enough.
Valet
Optional but encouraged. Laravel Valet configures your Mac to always run Nginx in the background when your machine starts. Then, using DnsMasq, Valet proxies all requests on the *.test domain to point to sites installed on your local machine.
Verify the install with valet -V and run, valet use [email protected] to ensure you are using 8.1 when working in Stratasphere.
If you receive the warning command not found: valet - this may be due to ensure that ~/.composer/vendor/bin directory is in your system's PATH, you can check this by running:
If not, add the following line to your ~/.bash_profile or ~/.zprofile
MySQL
Using Homebrew, install MySQL with brew install mysql
Verify the install with mysql -V
Redis
This allows us to use things like load balancing. Install Redis with both pecl and with Homebrew
To verify the pecl install, run, php -i | grep redis
To verify the Homebrew install and activation, run, brew services start redis followed by, redis-cli ping
Stratasphere (aka Playset)
Stratasphere (the project formally known as Playset - but still is named Playset in Github) can FINALLY be installed. At this point our directory structure is a broad "Code" folder followed by a 3Z subfolder. In the 3Z subfolder we will clone Playset.
Note that when you are building applications or working on a local copy of Strata, you will want to keep those in the 3Z directory under a folder called packages. It will make redirecting Playset packages to your local ones a lot less confusing if they are all at least within the 3Z directory.
Switch to the develop branch.
Once you have a local copy of playset and all the necessary installs listed above, we can start configuring our env files to work in Stratasphere.
Configure environment variables
Copy the .env.example to .env and set it up with your preferred variables.
To fill in some or the more sensitive values, that we can't commit to git, we use a service called Envault. Setting it up is easy, after your email is added to our list, go to Envault, sign in and select any of the apps (like Helix Sleep Settings) copy the string it shows you for how to set up the app, looks something like npx envault envault.hlx.dev 2 zDF1MuFVNo02DdWk, and run that in the playset directory to initiate it. To sync in the future all you have to do is run npx envault.
Some engineers may also have env files you can reference from within the shared 1Password if you are interested in already having some preconfigured env files. Ideally envault should do most of what you need however.
Important: You need to use a cache and session driver that supports atomic locks. Redis is good default and also what's used in production.
Setting up databases
Strata is a multi-tenancy platform, and each site in Playset has it's own database. Strata will create the individual sites databases on install, but you will need to setup the "central" database yourself. Usually it's named playset, but you free to name it something else.
Assuming you have MySQL installed with Homebrew, we will go into MySQL and create the playset database. We'll start by ensuring mysql is actually running
We then log into mysql by typing mysql on the commandline.
Confirm the databse within mysql with
Exit mysql with exit;
Install Composer dependencies
You might need to add you credentials for packages.hlx.dev to require some of our private packages. In your ~/.composer/auth.json add the following:
Your username and password will be provided to you.
If your auth.json doesnt exist, create a new one and add the line above or run composer install and you will be prompted for username and password during installation.
Now generate an app key with:
Install the Composer dependencies with
Composer may output errors that are due to you not running PHP 8.1, not having the .env file set, or not having the auth.json configured. Be sure to correct that before continuing.
Certain apps may also be missing from your .env such as Cloudinary credentials. You can bypass this for the time-being or follow up with the engineering team or poke around in some of the other envault settings to acquire any missing fields.
Install NPM dependencies
Symlink the Strata sites
Now we can start creating connections between our databases and creating our test urls with valet. In the commandline, add:
valet link will create the .test url, and valet secure will set the test link to https.
The list of all our sites are:
Install Strata
This will install all the created sites and create databases for each one. It will also seed it with some default data. You should now be able to go to birch.test/admin, given that you've set up the nginx/apache config for it depending on your setup. Again Laravel Valet makes this extremely easy. The database has been seeded with four users for you that you can use to login with. Each one has been seeded with the respective permission to their name.
Tip: With Valet your can easily link a domain to the a directory. From within the "playset" directory run
valet link birch. So when you go to birch.test Valet will redirct you to the "playset" directory and serve it from there, and Strata will handle the routing for you.
Base nginx config
If you would like to run a site without using Laravel Valet you can use this simple nginx config to get started! Note you will have to replace TENANCY and the ROOT_PATH to the current site you wish to use.
Starting your first ticket
Stratasphere makes it easy to get started on working on a specific ticket assigned to you in Jira. All you have to do is run
This will provide you with a list of tickets that have been assigned to you and are selected for development grouped by projects.
You can also specify a specific ticket by its Jira ID if you already know the ticket ID.
Example to start work on Brooklyn Bedding "BB-8" ticket.
Setup
Two environment variables needs to have been set for this to work. TICKET_USERNAME and TICKET_TOKEN=.
TICKET_USERNAME is the email address you use to log into Jira.
Follow these steps to generate a Jira token for TICKET_TOKEN:
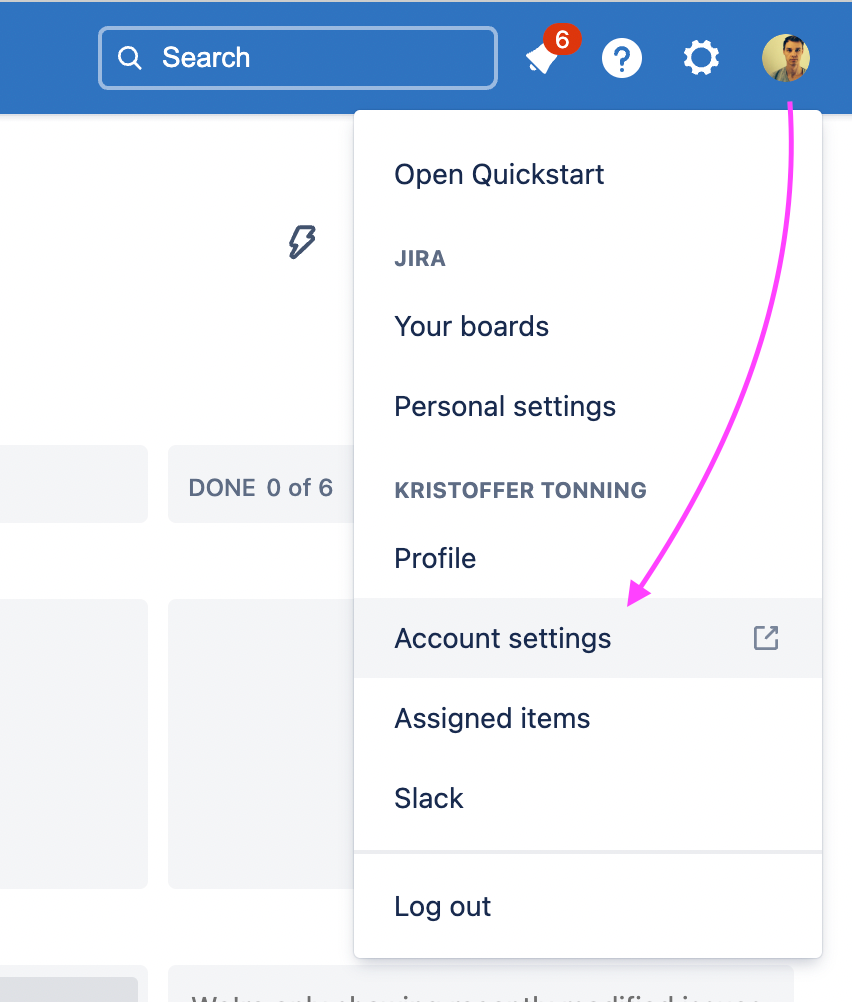
Select "Account settings" under your profile dropdown
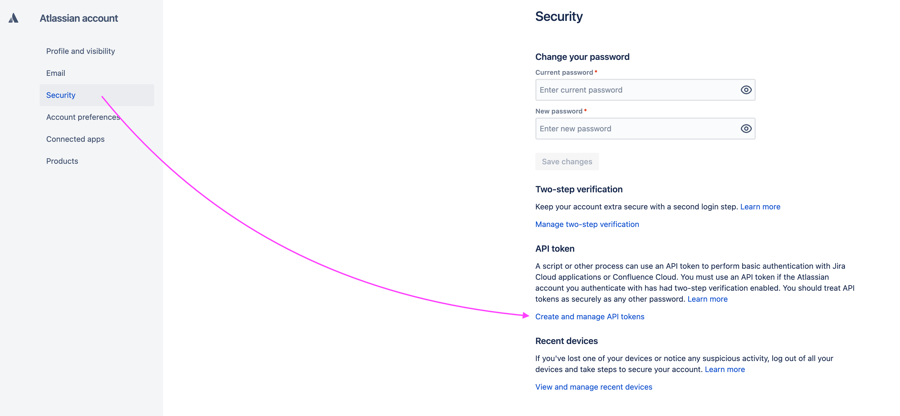
Select "Create and manage API tokens" under the "Security" tab.
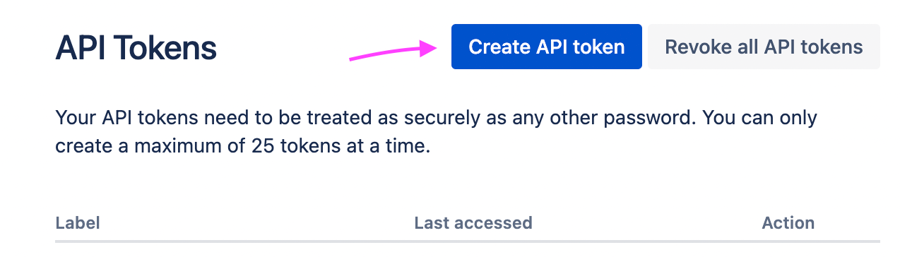
Click the "Create API token" button.
Add the values to your .env file
Developing packages locally
If you need to develop a package, the process of committing changes to said package, pushing up the changes, and doing a composer install in Playset to pull down those latest changes may be cumbersome. To mitigate that process, we can temporarily symlink the local version of the package to your Playset repo. We manage symlinking through the root composer.json file by modifying a few lines.
First, we need to tell Composer to use our local path of the package.
So in the repositories section of the composer.json file (please create the section if it doesn't exist), we add a section about the package we want to develop locally. In this example, we want to work on Strata.
Example
If this is a new package that hasn't been added before, be sure to also add it to the require section
The last step is to tell Composer which branch we want to pull in instead of a version number. This is done in the require section of the composer.json file. You prefix the git branch with dev-xxxxxx. So if you're going to work on your develop branch you putdev-develop in the composer file; on the main branch you would enter dev-main; on a feature branch named, feature/my-new-feature you would replace it with dev-feature/my-new-feature; in a test branch of, some-bug-fix: dev-some-bug-fix etc.
It is important the branch that we specified in the
composer.jsonfile has been checked out and is your currentHEADin git.
Tip: This process is similar to Strata App development. To learn more about app development in Strata for use in Playset, please visit the app development section found in the Strata documentation.
Example
All there's left to do is to run composer update [NAMESPACE]/[PACKAGE]
Example
Tip: Sometimes you run into version constraints because another package is dependent on the package you're trying to pull in. For example you have a package called
astrogoat/my-appwhich requireastrogoat/strata: "^0.1.0". Composer will now bork at you and say that it can't pull inastrogoat/strataatdev-develop. A trick to get around this is to alias it:"astrogoat/strata": "dev-develop as 0.1.0".
Last updated